PLM's
Apps:
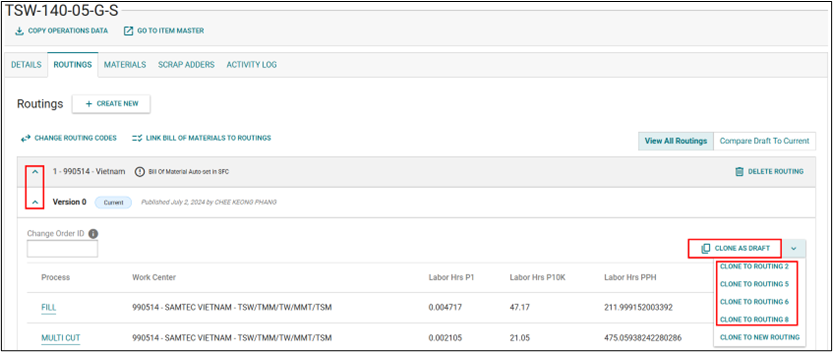
Change Management Artifact Management Like Part Generator Bill of Material & Routing Series ManagementThere are two methods to create a new routing:
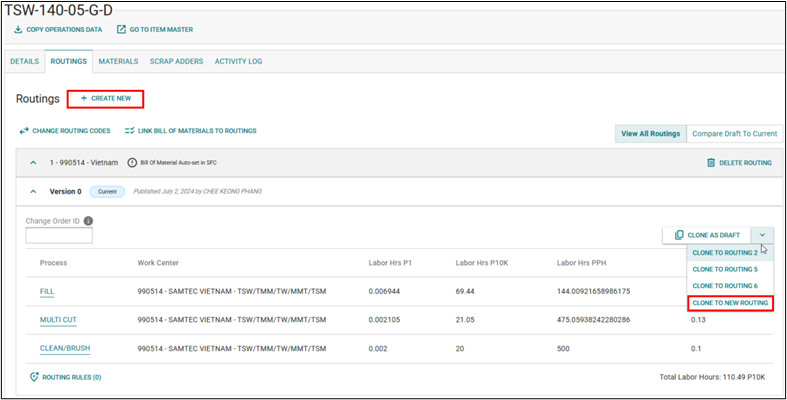
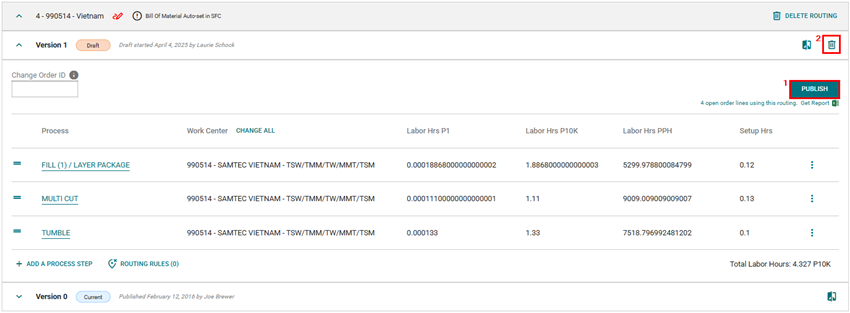
The routing code automatically saves the draft with each change.
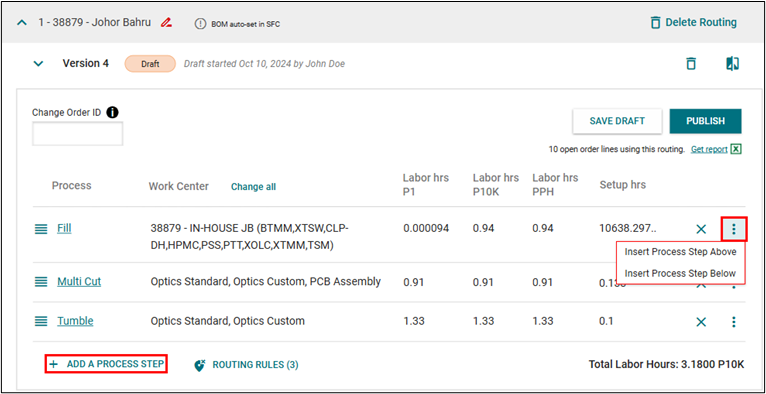
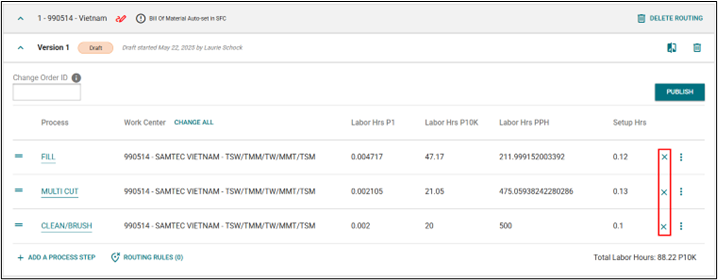
To edit a routing, expand the current version and select
a. Change Order ID can be edited while routing code is in current or draft state
b. System validates the Change Order ID exists in Change Management
c. Change Order ID hyperlinks to change order in Change Management
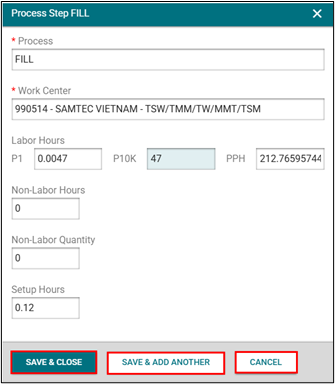
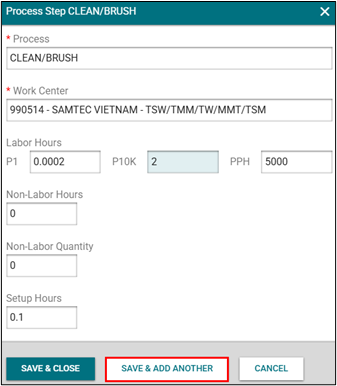
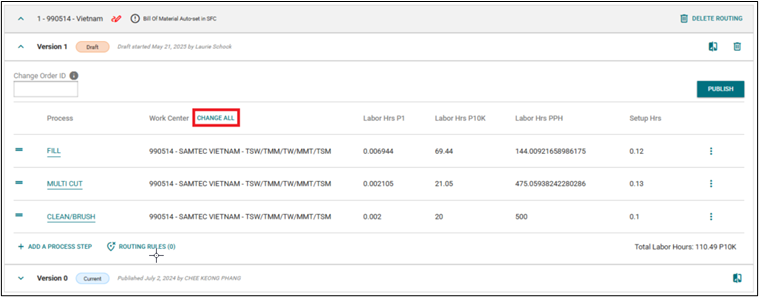
To edit details, click on the Process name

a. Click on + Add A Process Step
b. Click on the kebab (vertical three ellipses) for a process step and select Insert Process Step Above or Insert Process Step Below
The work center for the new process step will mirror the work center of the previous process step unless it is the first step which will mirror the first work center
Example: selecting the insert above or below the FILL step will copy the 38879 Work Center ID. If selecting insert above from the Multi Cut process the work center would be 38879 – In-House JB (BTMM,XTSW,CLP-DH,HPMC,PSS,PTT,XOLC,XTMM,TSM), but if inserting below the Multi Cut process the work center would be Optics Standard, Optics Custom, PCB Assembly
c. Click Save & Add Another if a new routing step needs added after the current routing step detail is entered
a. Click the X delete icon on the routing step that needs deleted
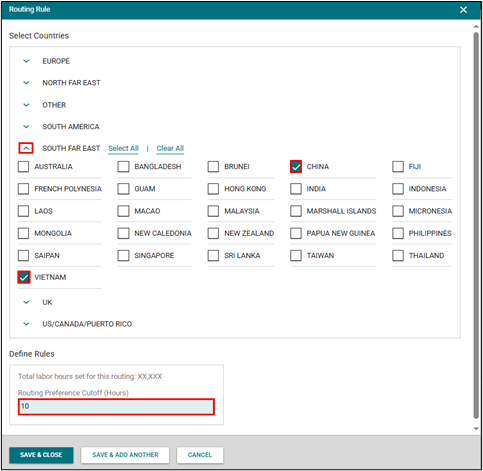
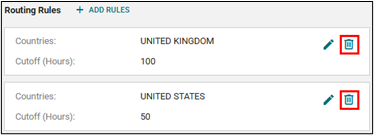
a. Scroll to the bottom of the routing draft, click Routing Rules
b. Click + ADD RULES

c. Expand Region and select Country(ies) to apply the routing rule to
d. Enter the Routing Preference Cutoff (Hours)
e. Click Save & Close if there are no additional routing rules to be applied
f. Click Save & Add another if there are additional routing rules to be applied
g. Click Cancel to exit the routing rules screen
Routing Code must be in draft status
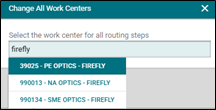
Click on CHANGE ALL next to the Work Center table heading
Search for the new work center
Click Save
There are two ways to get to the Comparison Screen
i. Click on the Compare Draft To Current button – opens the comparison screen with the first routing code in draft status being compared
ii. Click the Compare to Other icon button within the routing code draft – opens the comparison screen with that routing code draft being compared
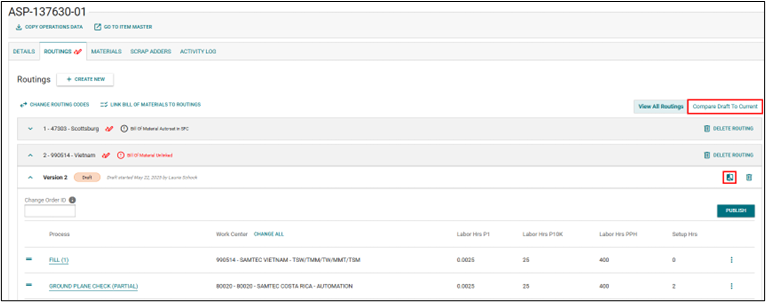
Within the Comparison Screen a user can select which routing code they want to view the comparison for. This is limited to Current vs. Draft of the same routing code.

Compare:
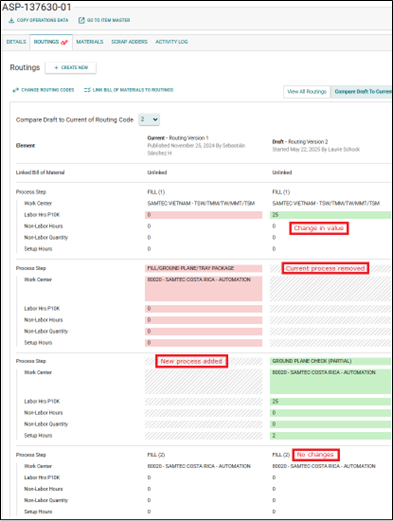
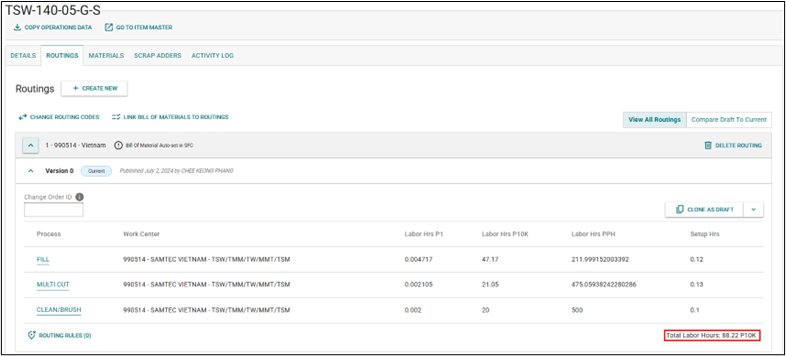
Total Labor Hours are visible in all states of a routing code (current, draft, etc.)
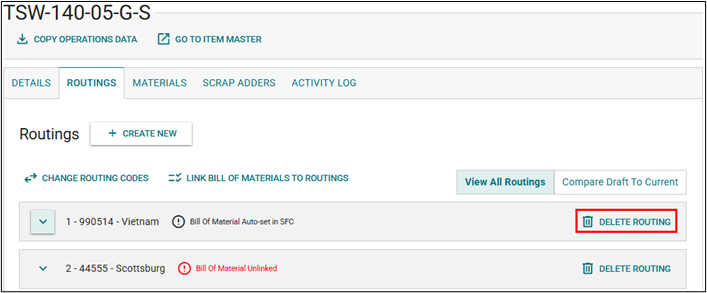
Click Delete Routing beside the routing code to delete it
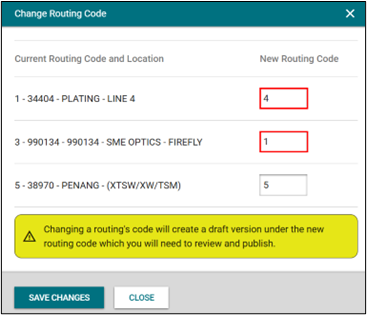
Use the Change Routing Codes feature to update multiple codes simultaneously.
Click on Change Routing Codes
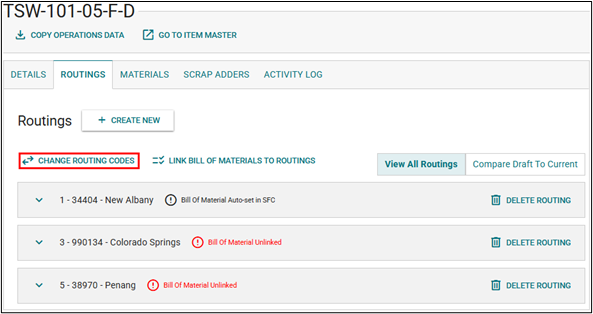
Input the new routing codes


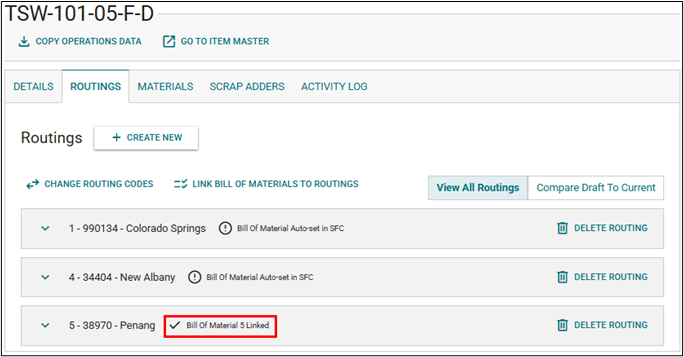
Currently Routing Code 1 and Routing Code 4 linking is auto-set in Shop Floor Control
Routing Code 1 linked to Bill of Material Code 1
Routing Code 4 linked to Bill of Material Code A
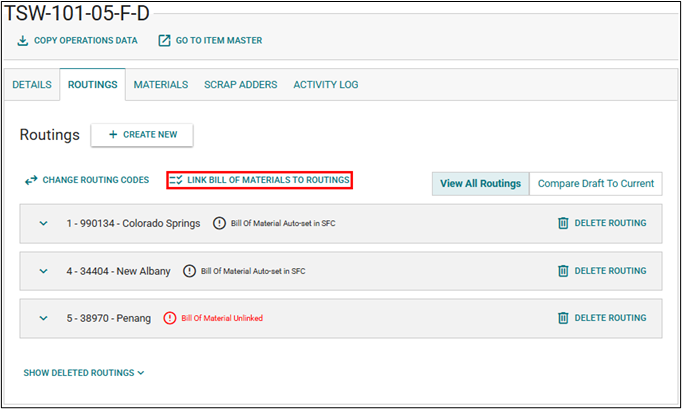
Click Link Bill of Materials to Routings button
Users can expand the available bill of materials to see the level 1 components for that code
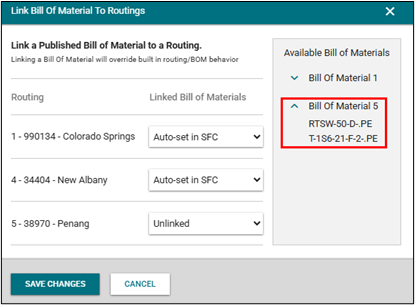
Click the Linked Bill of Materials drop down next to the routing code and select the Bill of Material code to link
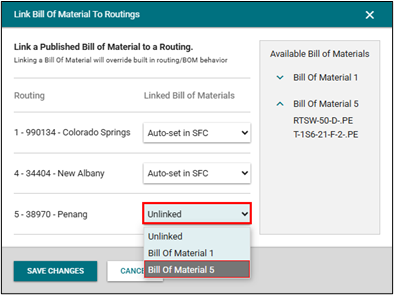
Save Changes
The linked Bill of Material will display next to the routing code on the Routings tab
A draft can be updated continuously until published. Once published, the routing version goes live in production.
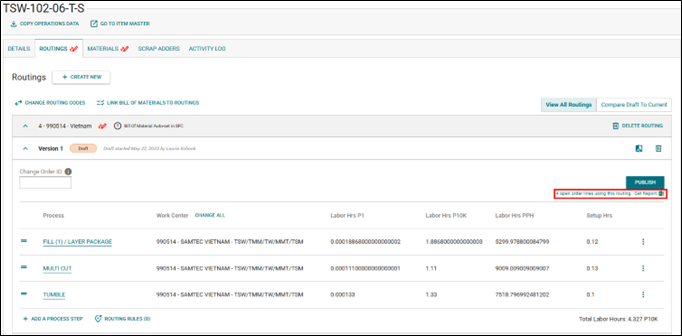
By default, open orders will be updated upon publication unless this option is deselected.
There are two ways to view current open orders:
If open orders exist for the part being published, an Excel document will be linked under the Publish button.
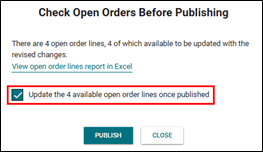
Upon clicking Publish, a modal will appear showing the number of open orders and the count of those eligible for updates. This modal will also contain a link to the Excel document.
To prevent updating open orders on Publish, uncheck this box.
Open Orders Report:
